Hello there blogging buddies!! I hope your week is going well! My youngest daughter has a birthday party to go to tonite and I was in need of some crafting therapy so I got out my supplies and sat down and made this 3d flip flop box to give to her friend. This box is a free svg file I got from here some time ago and am just now making it. I have seen several wonderful examples of this floating over the internet and mine is certainly not going to put any of those to shame but I am pleased with how it turned out and my daughter loves it which makes me happy! We put a couple of the smaller presents for her friend inside.
Showing posts with label svg. Show all posts
Wednesday, August 1, 2012
Wednesday, February 22, 2012
Cupcake Birthday Card
I am trying to challenge myself to use some of my svg files and cricut cartridges that I have owned for awhile and have left neglected. You know how it is, we are always excited about that next new thing (cartridge/svg set) that we forget to enjoy what we have:-) This card is made using a Lettering Delights SVG from their J'Adore set. I purchased this set during their last dollar days sale. I created a shadow for the cupcake and welded two shadows together to make the card base. The rest is pretty straight forward. I did some embossing with my cuttlebug, added a little stickles and pen doodling, a sentiment from Cardz TV stamp set "Ticket Talk" and voila!! I have a birthday card ready to go at a moment's notice.
I am going to enter this in the following challenges -
My Craft Spot - challenge #45 birthday shape cards
I am going to enter this in the following challenges -
My Craft Spot - challenge #45 birthday shape cards
Wednesday, February 1, 2012
SVG Attic design team - February challenge "use a heart"
So, I get to let the cat out of the bag today (insert big grin here:-) I have been selected to join the SVG Attic design team!! I am so excited to work with Jessica and the rest of these talented ladies. I have followed a few of these ladies' blogs for awhile now. I am also enjoying working with my Silhouette Cameo and Scal 3. For my project I challenged myself to work with the "print and cut" feature with the cameo. I must confess I do not have it perfected yet using Scal 3 but it is getting better each time. In fact, when I was really having issues in the beginning stages, the great people over at Craftedge (makers of Scal) worked with me and tweaked their software to make it work better. Don't you love it when you receive great customer service!!
I used the heart tree from SVG Attic's "Give a Hoot" collection which you can find here. I printed out the trunks of my trees as well as my sentiment. I then cut the hearts for the trees. I popped up the center heart with some foam tape and added a red heart brad to it. I used another heart on the inside of the card to keep the theme going there too.
Make sure you head over to SVG Attic blog to meet the rest of the design team and get some more inspiration for the February challenge. I encourage you to join us in this challenge - after all, what better month to make a project using a heart?? You can find out all the "specifics" over at the blog!!
Stop back in on Friday and see how I used a file from this new SVG Attic Heart Shaped Box set to make a cute Valentine's gift!!
I used the heart tree from SVG Attic's "Give a Hoot" collection which you can find here. I printed out the trunks of my trees as well as my sentiment. I then cut the hearts for the trees. I popped up the center heart with some foam tape and added a red heart brad to it. I used another heart on the inside of the card to keep the theme going there too.
Make sure you head over to SVG Attic blog to meet the rest of the design team and get some more inspiration for the February challenge. I encourage you to join us in this challenge - after all, what better month to make a project using a heart?? You can find out all the "specifics" over at the blog!!
Stop back in on Friday and see how I used a file from this new SVG Attic Heart Shaped Box set to make a cute Valentine's gift!!
Thursday, January 26, 2012
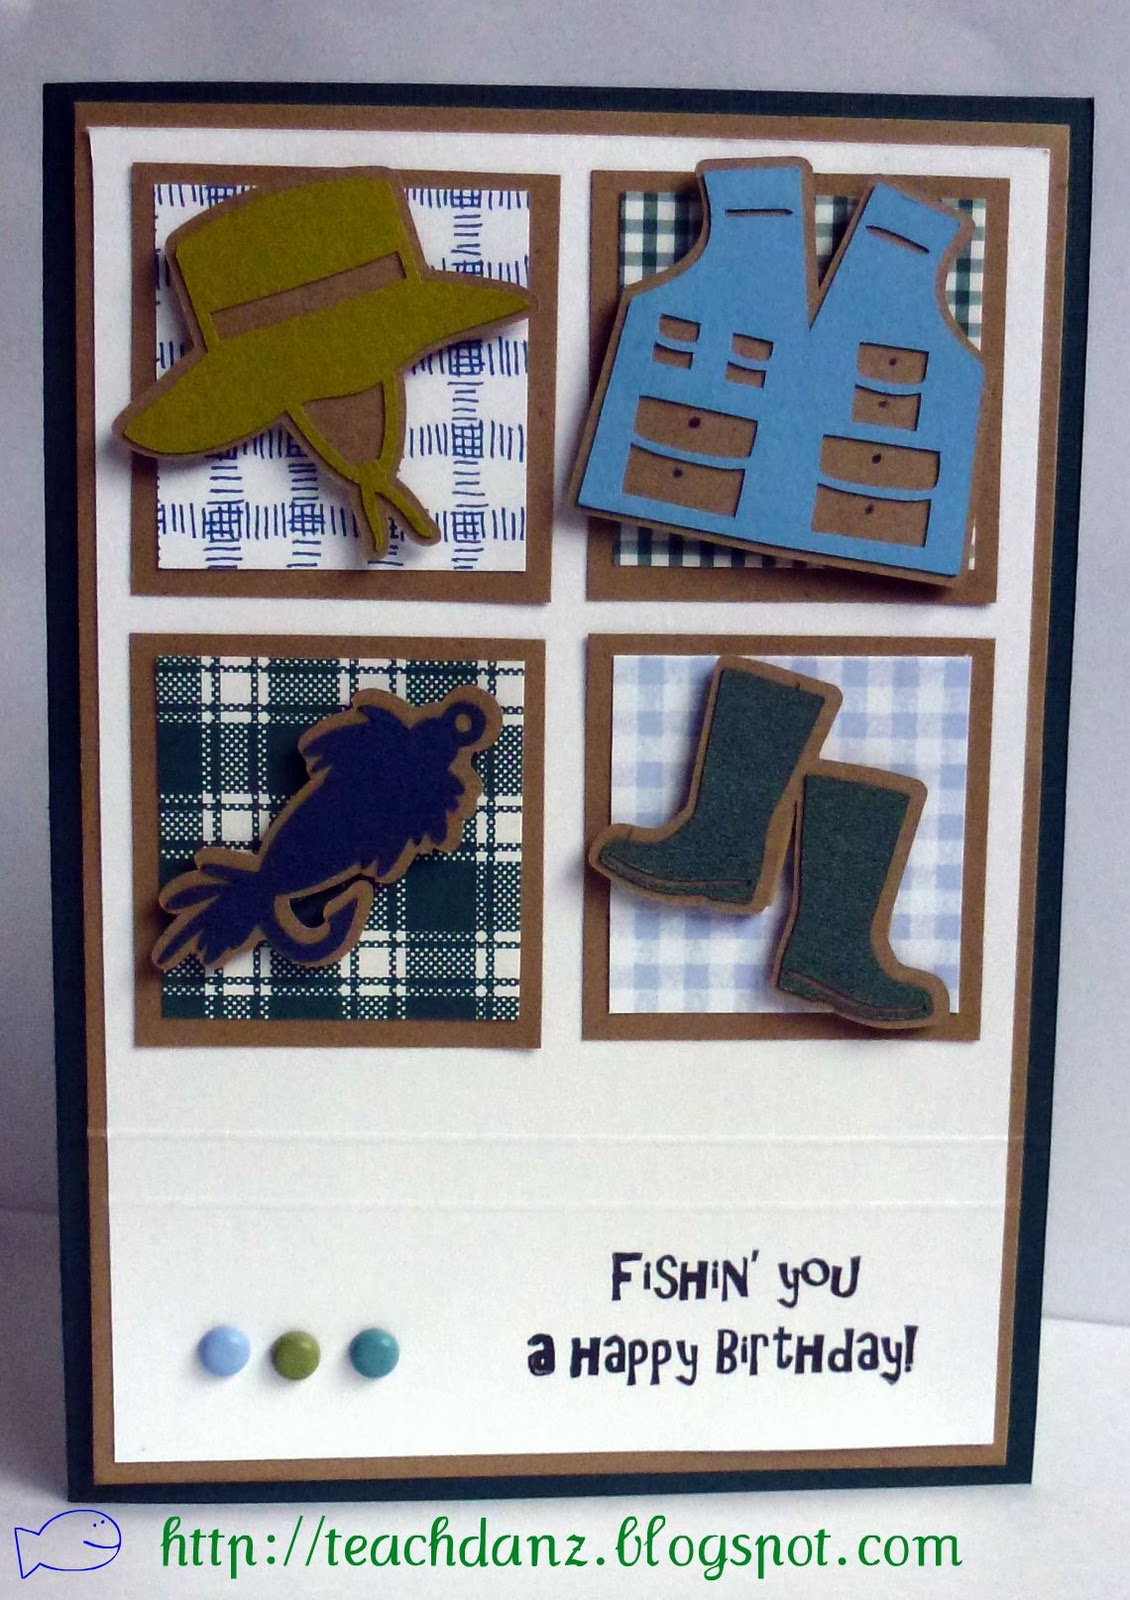
CardzTV Design Team Challenge #4: "Its A Guy Thing"
Welcome to another CardzTV design team challenge!! The theme for this challenge is "It's a guy thing" and the challenge is to make a masculine card for any occasion using CardzTV Stamp Set "Its A Guy Thing". I have had an idea in mind to use a new cut set I purchased from Lettering Delights during their dollar days sale earlier this month. I used the fishing cut it simple shapes set. I created a shadow for each of the shapes using SCAL 3 and some scrap paper from Creative Memories for my 4 squares and popped each of the fishing shapes up on foam tape. I used my score board to make two lines separating the sentiment from the cut shapes, added 3 similar colored brads, a sentiment from CardzTv and voila!!! My hubby's birthday card is done early!! (His birthday isn't until the end of May, but at least I am ready:-)
Mary will be giving away one of her stamp sets during this weekend. Head on over to CardzTV to see the rest of the design team's projects and to join the fun of this challenge!! While you are there make sure to check out all of the new stamp sets Mary has released - there are 6 new sets and they are fabulous!!
Sunday, January 22, 2012
Cupid Valentine Card Cardz TV Stamps
Here is another Valentine's Day card I made. The cupid is an svg cut (can't remember where I got it but will let you know if I figure that out:-) I created a shadow uisng Scal 3. I cut the hearts out with my heart punches from Creative Memories. The ribbon is some more crinkle ribbon that I made. I used another punch to slide the designer paper onto the red cardstock. I did the same thing on the inside of the card.
I used Cardz TV's "Ticket Talk" stamps for all of the sentiments. I used scotch tape over portions of the stamp when I only wanted to use one word from a phrase such as "hug" and "kiss". I removed the scotch tape after I inked the stamp and then only the inked part of the phrase stamped. Hope that makes sense:-)
Tuesday, January 3, 2012
Warm Winter Wishes
Ironically it is actually warm where I live today. The thermometer says 51 degrees and the sun is out which is a nice change. The sun tends to hibernate in the winter here in Oregon. On top of the beautiful day, there is the energy of knowing the Ducks won the Rose Bowl:-)
I have mixed feelings about getting back to our school/work routine. I know my kids are growing up and there aren't too many "Winter Breaks" left for our household but on the flip side I look forward to the peace that routine can bring. Enough rambling for now and onto the card -
I cut this out using my new Silhouette Cameo and the Eskimo Kisses svg set from Lettering Delights. I used Stampin Up Dimensionals to pop up the snowflake in the center as well as the entire snowflake and also the sentiment. I used some diamond stickles on my lavendar brad and embossed the top portion of the snowflake with divine swirls embossing foler. The sentiment comes from CardzTV's "Home for Christmas" set. I figure it is winter and we can still use this sentiment:-) Thanks for stopping by today and have a blessed day:-)
I have mixed feelings about getting back to our school/work routine. I know my kids are growing up and there aren't too many "Winter Breaks" left for our household but on the flip side I look forward to the peace that routine can bring. Enough rambling for now and onto the card -
I cut this out using my new Silhouette Cameo and the Eskimo Kisses svg set from Lettering Delights. I used Stampin Up Dimensionals to pop up the snowflake in the center as well as the entire snowflake and also the sentiment. I used some diamond stickles on my lavendar brad and embossed the top portion of the snowflake with divine swirls embossing foler. The sentiment comes from CardzTV's "Home for Christmas" set. I figure it is winter and we can still use this sentiment:-) Thanks for stopping by today and have a blessed day:-)
I am entering this in the following challenges -
My Craft Spot - Challenge #39 Winter Wonderland
Sunday, December 25, 2011
Merry Christmas!! Holiday Charger Plates done with Vinyl
Well, like most of you, the last week has been soooo busy getting ready for today that I haven't done any blogging. I have done a lot of crafting but didn't get a lot of pictures taken unfortunately. Yesterday I finished up my Christmas projects. I made these Holiday Chargers by cutting out vinyl with my Cricut. I used svg files for all of my work but there are lots of great files on our cartridges that would work too. Hope these inspire you for next year. I purchased my plates from Michaels and Walmart.
Wednesday, December 14, 2011
DtsArt Design Team - Gift Card Holders
Well, this is our last project for this term of the DtsArt design team. I have really enjoyed working with Dardi's files - they are so user friendly!! This week we have an assortment of gift card holders, just in time for your last minute Christmas shopping, huh:-)
Aren't those cute gift card holders!! You can pick up the file for these at DtsArt. Remember these aren't Cricut files per say. They are svg files but they also come in Make the Cut format and Scal format too.
***Included with your files is a text file with the accurate sizes. Please refer to this because different programs open the files up in different sizes. I use Scal 2 and it always opens my files up at a different size. I learned this through trial and error:-) So to make sure you are cutting out what was originally intended, always refer to the text file that comes with your purchase.***
Please head over to DtsArt Blog to see how the rest of the design team decorated theirs:-)
Wednesday, December 7, 2011
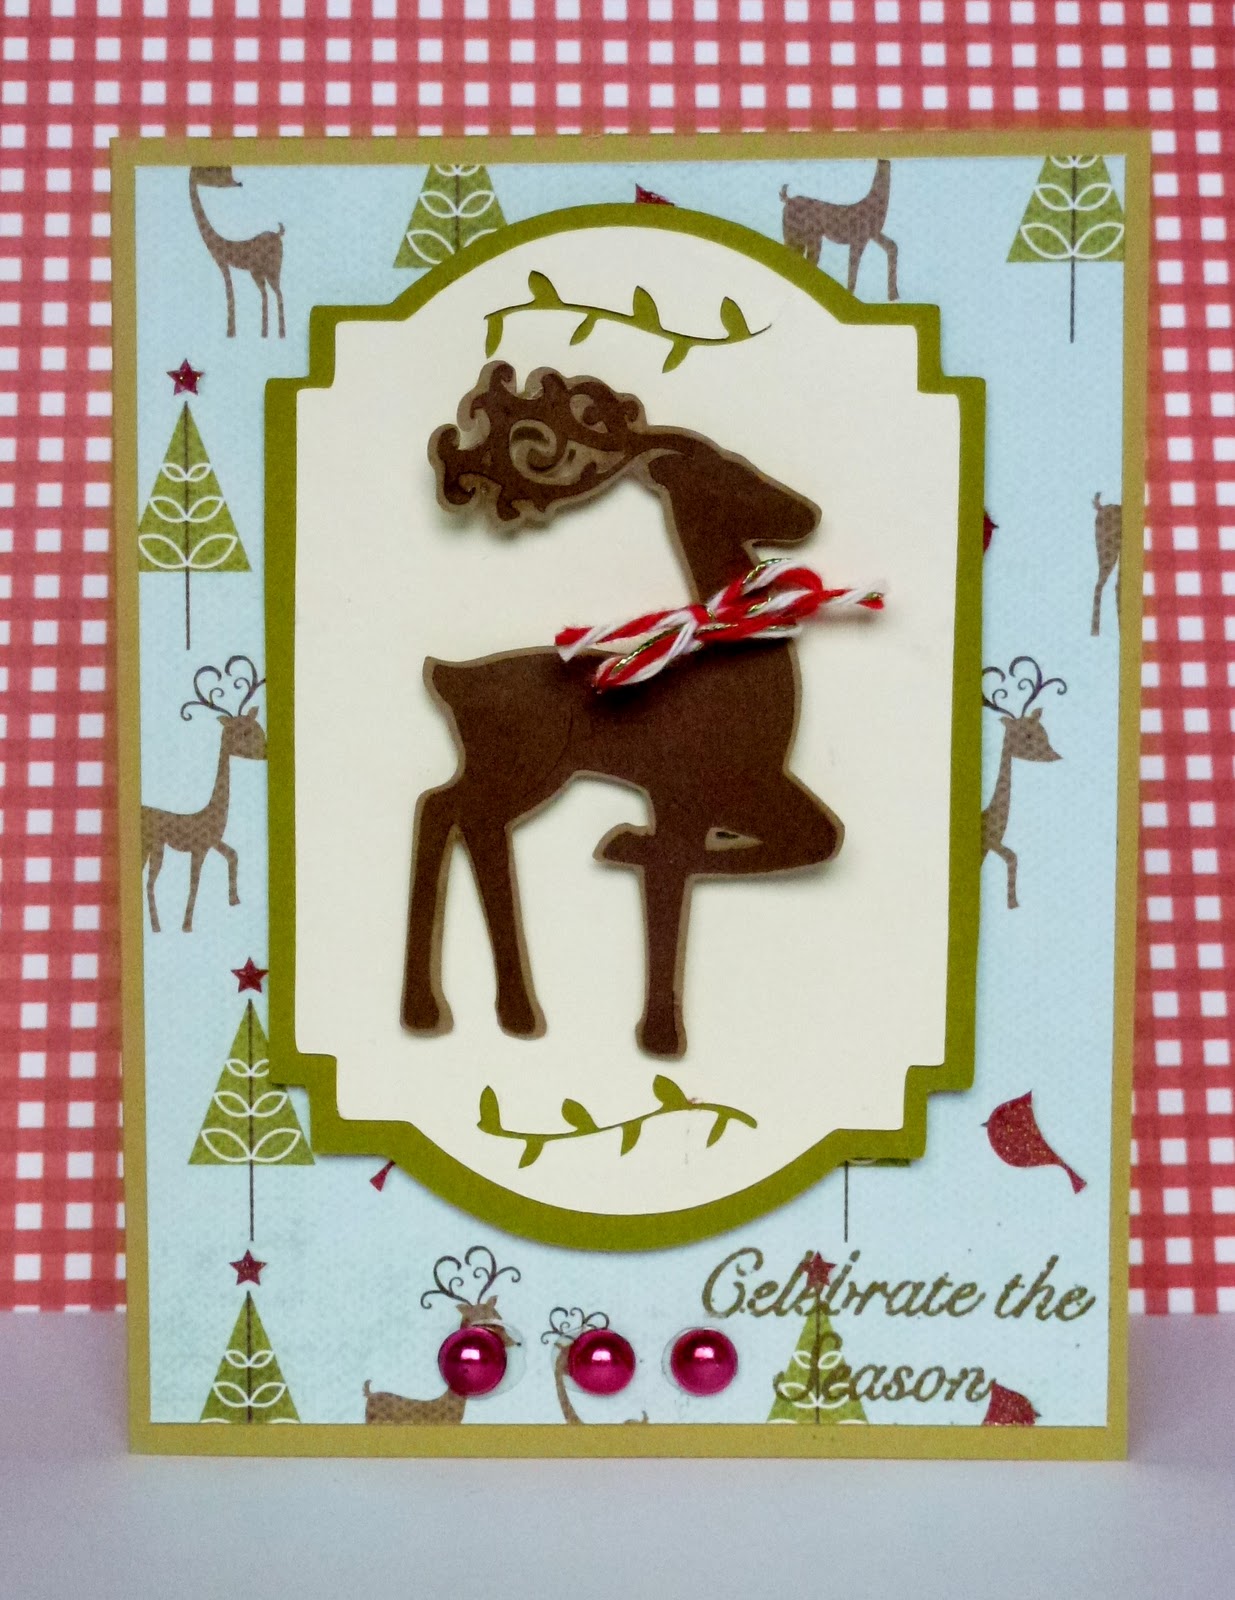
Reindeer Christmas Card
I made this card specifically for the Pumpkin Spice Shop Design Team Call. I had this card idea in my head ever since I went through my Christmas paper stash and rediscovered this piece of paper from My Mind's Eye "Believe" paper pack. I also used some Doodlebug Christmas twine and a Christmas stamp from My Pink Stamper.
This paper makes me smile:-) I made another card with this paper too and really enjoyed how they both turned out.
DtsArt Blog Hop - a trip down memory lane
We are finishing up our term with Dardi's design team by having a blog hop. We are calling it a trip down memory lane and are revisiting our favorite project from this term. You should have arrived here from Dardi's blog.
To be honest, I don't know if I have a favorite project because there were so many great svg's to work with. For today, I am going to share with you the rest of my post it note holders. I made a few when we showcased the post it note holder the first time but I had originally planned that I would make enough for my coworkers at the dance studio - a total of 12. Here are the final products -
I packaged them up in cellophane bags and used a Cardz TV stamp from the "Home For Christmas" set. Of course, I threw in some candy:-)
What would be a blog hop without some blog candy:-) I have for you a choice of either the post it note svg or this cute digi stamp from DtsArt -
Good luck!! Here is the line up:
Dardi: DtsArt Blog
Nicole: Teachdanz
Ruth: My Hobby=My Art
Tanya: My Little Craft Corner
Christina: Christina's Creative Corner
Stacie: Hestia's Helper
To be honest, I don't know if I have a favorite project because there were so many great svg's to work with. For today, I am going to share with you the rest of my post it note holders. I made a few when we showcased the post it note holder the first time but I had originally planned that I would make enough for my coworkers at the dance studio - a total of 12. Here are the final products -
I packaged them up in cellophane bags and used a Cardz TV stamp from the "Home For Christmas" set. Of course, I threw in some candy:-)
What would be a blog hop without some blog candy:-) I have for you a choice of either the post it note svg or this cute digi stamp from DtsArt -
To be eligible for this please leave me a comment with a way to contact you. I would love it if you were also a follower however I don't require it. I will post the winner on Monday, Dec. 12th so you have until midnight Dec. 11th PST.
*****Now for the real fun - there is a grande prize of 5 svg files of your choice or 5 digi stamps of your choice from Dts Art!! How do you win these? Well, visit each of the design team members blog and pick up a secret word from their blog. Put the words together to form the correct phrase and email it to DtsArtGames@hotmail.com.*****
My secret word is Bells.
Good luck!! Here is the line up:
Dardi: DtsArt Blog
Nicole: Teachdanz
Ruth: My Hobby=My Art
Tanya: My Little Craft Corner
Christina: Christina's Creative Corner
Stacie: Hestia's Helper
I am entering this in the following challenges -
More Than Favors - Christmas
Wednesday, November 30, 2011
DtsArts Design Team Post - Cocoa Mugs
***Some of you may recognize this post from last week as I was a week early on this project:-) Here it is again in hopes that others of you were too busy with the Thanksgiving preparations to notice it last week and it will feel "new to you", lol!***
Time for another project using svg files from DtsArts. I love these 2 svg files that Dardi created. One will make your typical pouch to fit a packet of hot cocoa inside and the other is a 3d mug that can be filled with all sorts of goodies. Both are quick and easy files to put together. I do suggest a strong glue for the 3d mug especially if you are filling it with candy.
You can cut this one out with the handle on either side. My paper was only printed on one side so to make the handle have patterned paper on both side I turned my image upside down and slid it to the end of the mat so it only cut the handle part. I then glued this onto the complete cut out mug and put it together after that.
To purchase these files click here. To see what the rest of the design team did with these files please go here. Stay tuned for our upcoming blog hop in December and you could have a chance to win either a free svg file or digi file from DtsArt.com.
Time for another project using svg files from DtsArts. I love these 2 svg files that Dardi created. One will make your typical pouch to fit a packet of hot cocoa inside and the other is a 3d mug that can be filled with all sorts of goodies. Both are quick and easy files to put together. I do suggest a strong glue for the 3d mug especially if you are filling it with candy.
You can cut this one out with the handle on either side. My paper was only printed on one side so to make the handle have patterned paper on both side I turned my image upside down and slid it to the end of the mat so it only cut the handle part. I then glued this onto the complete cut out mug and put it together after that.
To purchase these files click here. To see what the rest of the design team did with these files please go here. Stay tuned for our upcoming blog hop in December and you could have a chance to win either a free svg file or digi file from DtsArt.com.
Subscribe to:
Posts (Atom)
.jpg)
.jpg)
.jpg)